Let's assign three different materials to three Surfaces. When only one material is defined (which is a default option in each new project), one needs to first define multiple materials (and/or their soil hydraulic properties). This can be done as usual using the Menu command Edit->Flow and Transport Parameters->Water Flow Parameters->Soil Hydraulic Parameters. The same dialog window can be also displayed by clicking on the New Material or Edit Materials commands on the Edit Bar. Note that in Version 3.0 of HYDRUS, one can name materials.
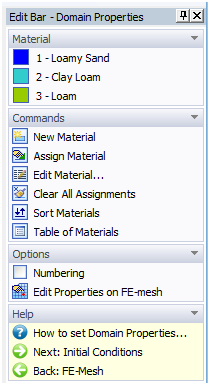
There are three different ways of assigning materials to particular geometric objects (Surfaces):
a) Click on a particular Surface (Geo Object) (to select it) and then on a Material (1, 2, or 3) in the Materials section of the Edit Bar to assign it.
b) Click on a Material (1, 2, or 3) in the Materials section (to select it) of the Edit Bar and then on a particular Surface (to assign it).
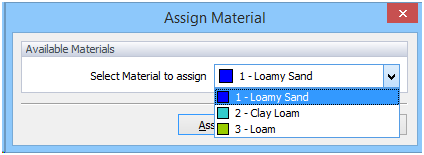
c) Click on the command Set Material in the Commands section of the Edit Bar, from the list box of the Set Materials window Select Material to set, click Assign to close the window, and click on a particular Surface (Geo Object) to assign the selected material.
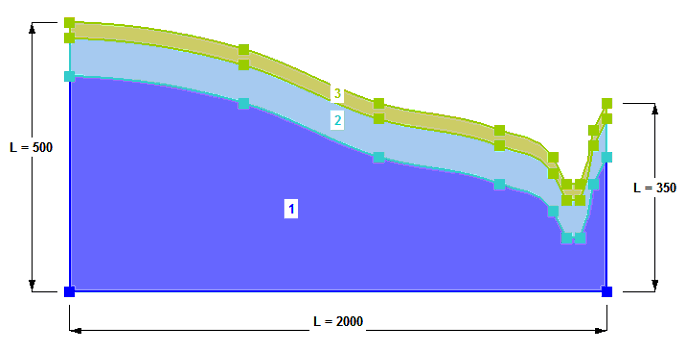
Note that nodes that are at the curve shared by two surfaces will be assigned a material with a higher number. Color squares at nodes defining the Geometry indicate, which material will be assigned to curves shared by two Surfaces.
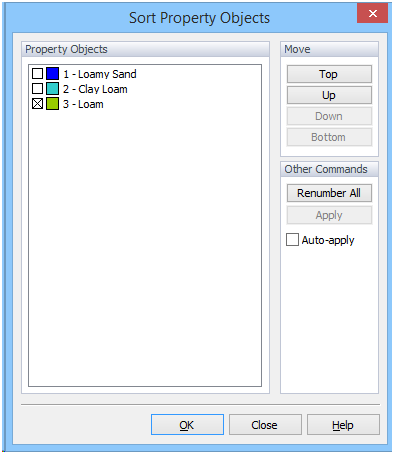
The sequence of materials (as well as other objects, such as Initial Conditions) can be reordered or sorted using the Sort Materials command on the Edit Bar and the Sort Property Objects dialog window. In this dialog, the order of materials can be sorted using the Top, Up, Down, and Bottom command. While the sequence of materials can be sorted, colors representing the first, second, and other materials will remain the same.
Sorting can be done in two modes. When the Auto-apply check box is checked, any change done in the Sort Property Object window is immediately transferred to the transport domain and to the rest of the program. When this checkbox is unchecked, changes made in this dialog are transferred to the rest of the program only when the Apply command is clicked or after the window is closed using the OK button.
The command Renumber All can be used to renumber the Property Objects. This is useful, when some previously defined Properties were deleted and the numbering is no longer sequential.
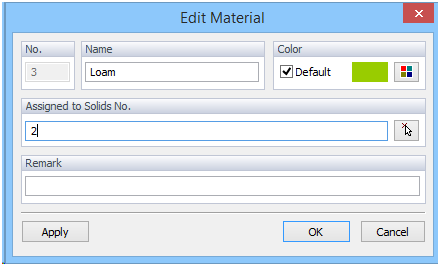
A single click on any Surface will select this surface. A double click on any Surface will open a dialog for a Property assigned to a particular surface that is currently displayed, e.g., the Edit Materials dialog window. In this dialog, one can change the Name of the material, its Color (the Default check box indicates whether the Color has been changed), Assign it to different Surfaces (indicated by their numbers), and register brief Remarks characterizing a particular material.
Once the FE-Mesh exists, assigned properties (e.g., Materials) can be transferred on the FE Nodes (if it exist) using the Edit Properties on FE-Mesh (when FEM exists and a particular Property has not been yet edited on FEM) or the Transfer to FE-Mesh (when a particular Property has already been edited on FEM) commands located on the Edit Bar. Here the assignment of materials can be further edited, refined, and finalized. However, these changes cannot be transferred back on the Geometric Objects. After changes have been made on FEM and thus Properties assigned on FEM and Geo Objects no longer correspond, the command Transfer to FE-Mesh can be used to synchronize again the information in the two modes (from Geometric Objects to FEM).
The Edit Bar commands Edit Properties on FE-Mesh and Edit Properties on Geo Objects switches from one way of assigning properties (on Geo Objects) to another (on FEM).
Similar approach and similar commands can be used to assign other Domain Properties, and Initial and Boundary Conditions.
More information about How to Define Properties on Geometrical Objects.